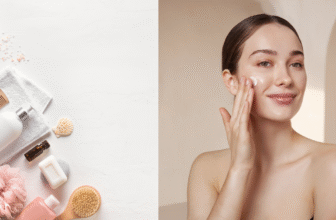
Everyone loves the radiant glow of healthy, clean skin.
But instead of visiting an expensive spa, did you know you can achieve spa-quality results right at home?
A traditional facial isn’t just necessary for maintaining skin health; it’s deeply relaxing and therapeutic.
This guide will show you exactly how to perform a professional-quality traditional facial to achieve cleaner, healthier, and brighter skin from the comfort of your home.
Whether you’re a skincare enthusiast, a beauty beginner, or someone looking to bring the spa vibes to your living room, this comprehensive tutorial is for you.
What is a Traditional Facial?
A traditional facial is a multi-step skincare treatment designed to cleanse, exfoliate, hydrate, and rejuvenate the skin.
This timeless routine focuses on removing impurities, deep-cleaning pores, and infusing the skin with hydration to achieve a balanced and radiant complexion.
What makes a traditional facial stand out is its focus on step-by-step meticulous care—it’s not about rushing through the process but giving your skin the attention it deserves.
Benefits of a Traditional Facial
- Deep Cleansing: Removes dirt, sweat, and makeup residue lurking in the layers of your skin.
- Unclogs Pores: Proper exfoliation and steaming eliminate blackheads and prevent breakouts.
- Boosts Circulation: Massage techniques improve blood flow, giving skin that enviable glow.
- Hydrates and Replenishes: Your skin receives nutrients, improving elasticity and texture.
- Promotes Relaxation: A facial is as much for mental well-being as it is for physical benefits.
Now, grab your favorite skincare products, tie your hair back, and let’s learn how to perform a traditional facial!
Step-By-Step Guide to a Clean Skin Facial
Step 1: Set Your Mood (Optional but Worth It!)
To make this process feel indulgent, create a calming spa-like environment.
Use candles, soothing music, aromatherapy, or even a cozy bathrobe—whatever helps you relax.
When you’re in the right state of mind, the benefits of your facial will feel amplified.
Pro Tip: Eucalyptus essential oil diffusers or a warm chamomile tea can add an extra layer of tranquility.
Step 2: Cleanse Your Skin
The key to any good facial is starting with a proper cleanse.
Use a gentle, sulfate-free cleanser to remove dirt, oil, and makeup without over-stripping your natural oils.
- Apply the cleanser using your fingertips in small, circular motions.
- Rinse with lukewarm water (avoid hot water, as it can dry out your skin).
- Pat your skin dry with a clean, soft towel.
For perfect results, perform a double cleanse if you wear makeup or SPF. The first cleanse removes makeup, and the second ensures your skin is squeaky clean.
Step 3: Exfoliate for Smooth Radiance
Next, buff away dead skin cells with an exfoliant to reveal your smoothest, brightest skin.
- Choose a physical exfoliant (like a scrub with tiny beads) or a chemical exfoliant (like AHAs and BHAs).
- Gently massage the product for about 1–2 minutes, focusing on areas prone to rough patches (e.g., nose and chin).
- Rinse thoroughly.
Avoid Overdoing It: Exfoliate your skin no more than twice per week to prevent irritation.
Step 4: Steam Your Face
Steaming takes your facial to the next level. This step softens the skin and opens up pores for a deeper clean.
- Fill a large bowl with hot (not boiling) water.
- Lean over the bowl with your face about 6–8 inches above the water, draping a towel over your head to trap the steam.
- Steam for 5–10 minutes to loosen any stubborn dirt or blackheads.
Pro Tip: Add herbs like dried lavender or green tea to the water for extra relaxation and skin benefits.
Step 5: Extract (If Necessary)
If you have blackheads or clogged pores, this is the point where you can gently remove them.
- Wrap your fingertips in clean tissue paper to prevent bacteria transfer.
- Apply light, even pressure, around the blackheads—never force them out! Leave it alone to avoid damaging your skin if it doesn’t budge.
You can also use a blackhead removal tool, but remember to sterilize it beforehand.
Step 6: Apply a Face Mask
Choose a mask based on your skin’s needs (hydrating for dry skin, clay-based for oily skin, or soothing for sensitive skin):
- Apply an even layer of the mask to your face, avoiding the eye and lip areas.
- Leave the mask on for 10–15 minutes or as directed.
Pro Tip: Use a cold jade roller over the mask to boost its absorption and cool your skin simultaneously.
Rinse off the mask with lukewarm water and pat your face dry again.
Step 7: Tone and Hydrate
Apply a toner to restore balance to your skin. Toners help shrink pores, balance your skin’s pH levels, and prepare it for moisturization.
- Pour a small amount of toner onto a cotton pad and gently sweep it across your face.
Once toned, follow up with your favorite hydrating products.
Use a lightweight serum for added hydration and nutrients, then finish with a high-quality moisturizer to lock everything in.
Step 8: Massage for Better Circulation
Most professional facials include a massage—and for good reason!
Massage stimulates blood flow, promotes lymphatic drainage, and gives that rejuvenating “post-facial glow.”
- Use upward and outward strokes and gentle pressure to massage your cheeks, forehead, and jawline.
- Don’t forget your neck and décolletage; these areas benefit just as much.
Consider using a facial oil or cream for smoother movement during the massage.
Step 9: Protect with SPF (Daytime)
Remember to wear sunscreen to protect your freshly pampered skin from harmful UV rays if you’re performing your facial in the morning or afternoon.
Use a broad-spectrum SPF 30+ to shield against damage and premature aging.
Bonus Tips for Keeping Skin Clean All Week
- Maintain a Skincare Routine: Consistency is key! A daily cleansing, hydrating, and protecting routine ensures your facial results last longer.
- Keep Your Tools Clean: Wash your hands, towels, and any tools used during your facial to avoid introducing bacteria.
- Hydrate Inside and Out: Drinking plenty of water and using humectant-rich moisturizers keep your skin supple.
Glow from the Outside and Feel Good Inside
There you have it—your ultimate step-by-step guide to performing a traditional facial at home.
By incorporating these steps, you’ll say goodbye to dull, clogged skin and enjoy some much-needed “me time.”
Here’s to clean, glowing skin at home.
To stay up-to-date with the latest articles, tips, and news from our blog, consider subscribing to our newsletter!
You’ll receive regular updates delivered straight to your inbox, making it easy to keep in touch with all things related to our content.